While watching a movie, playing some games on your PC, you might have felt like saving a short clip for the future. That’s when the question of how to record screen on Windows 10 would have crossed your mind.
Here are some easiest ways following which you can record your screen at your comfort:
1. Record screen using Windows 10 Inbuilt Screen Recorder
I have been using Windows 10 for very long, and I thought I knew everything about all the features the operating system is packed with. However, some of its features are hidden in a way as if they are top secrets.
One such excellent feature is to record screen on Windows 10. What? Like me, you too didn’t know how to record screen on Windows 10? The reason being, screen recorder is hidden in the Game bar, which many people who not play games on PC ever visit.
Screen recorder not being a standalone utility does not show up in the Start menu. It can be found in the game bar. However, you may have seen it, yet didn’t recognize its utility. Here is the process to access and use it:
Search for the “Game Bar” in the Start menu and select options to “On” and tick the box given below.
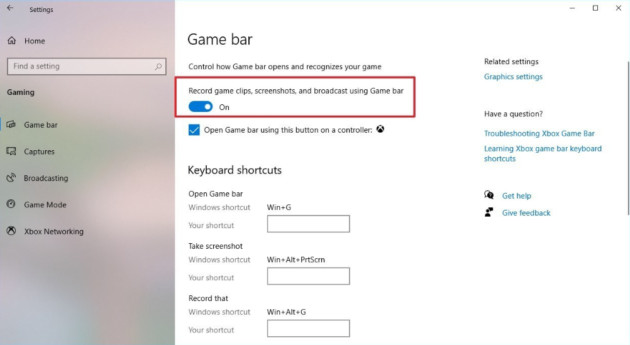
Alternatively, you may also press the Windows button plus “G.” It will look like:

Tick in the box and then following will appear:

Tapping on the “camera” icon will allow you to take a screenshot whereas, tapping on the “Red circle” (record button) will start capturing the onscreen video (along with audio, if any). Alternatively, you can also use Windows + Alt + R to start recording.
To be more precise, there is no need to open the “Game Bar.” You can directly give the “Windows + Alt + R” from your keyboard to start recording.
In some cases, a prompt may appear that ‘screen recording is unavailable as gaming features have not been enabled.’ That should not be a problem as just ticking the box the window shows, will solve things, and screen recording will start immediately.
The record is saved in MP4 format automatically in a sub-folder named “Videos,” which is in the “Captures” folder of your user folder. You may get direct access to the recorded videos via Game bar too.
Record Windows 10 Screen using Free Open Source Software
Apart from the above built-in method, you can record screen on Windows 10 by several other methods, too, by installing some open platform apps. Some of them are free to download, while others are paid ones.
Let’s check the ones that are free.
2. Using Ezvid Screen Recorder
Touted as one of the world’s easiest screen capturing software and rightly so, Ezvid is certainly one of the best. The USP of this software is its uncanny speed that will save a lot of time for you. It is very easy to use, and in a matter of minutes, you can make and even upload the captured videos on YouTube.
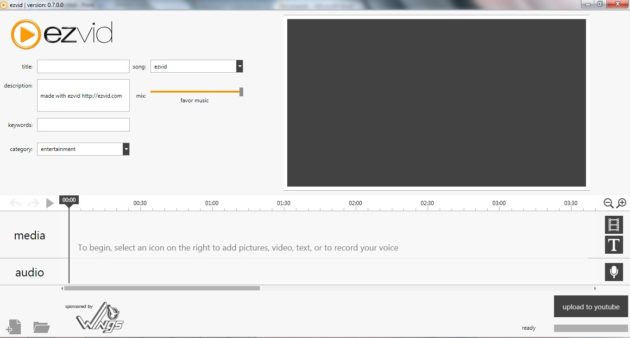
This is the reason why it is most popular among movie buffs and gamers who want to make videos and share them instantly.
This is the reason why it is most popular among movie buffs and gamers who want to make videos and share them instantly.
Pros of Ezvid
- Its inbuilt computer-generated speech can be incorporated for narrative purposes
- Capture videos in high resolution (1280 x 720p)
- You can control the speed of output videos
- Easy to use and novel user-interface
- Instant YouTube upload
Cons of Ezvid
- Videos have noise
- Minor bugs reported
3. Using Free Cam Screen Recorder
Free Cam is free screen-capturing software, which boasts all the features a premium software has. Most importantly, even the free version does not carry any watermarks on the captured video. This is ideal for those who want to make tutorials and educational videos.
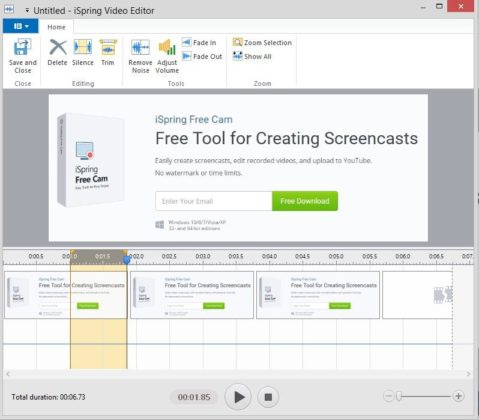
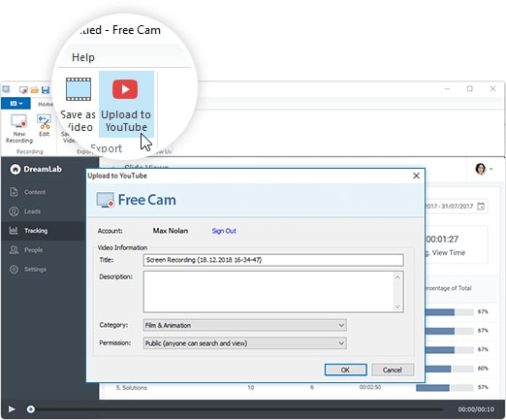
You can choose the area you want to capture with Free Cam. It also allows you to delete any unwanted part in the captured video. You can add your voice to the recorded videos and make them even more presentable. And once your video is ready, you may upload it directly to your YouTube channel right from the taskbar.
Pros of Free Cam
- The best part is the captured videos do not carry any watermark, and it is ad-free
- Voice recording feature available and you can record the audio of the PC too
- Resolution of the videos captures may be altered according to your taste
- You can save the videos in WMV format and upload them on your YouTube channel
- Comes with all editing tools
- You can remove the background noise
- Availability of a wide range of audio effects
Cons of Free Cam
- Records and saves videos in only one format, i.e., in WMV format
- Webcam recording feature not available
4. Use CamStudio
CamStudio is suitable for those who use screen capturing rarely, or in other words, this is not for regular users. The best part is it is apart from being 100% free, and it is a very small file and very easy to download and install. It comes with a lot of inbuilt features like editing and cropping the videos.
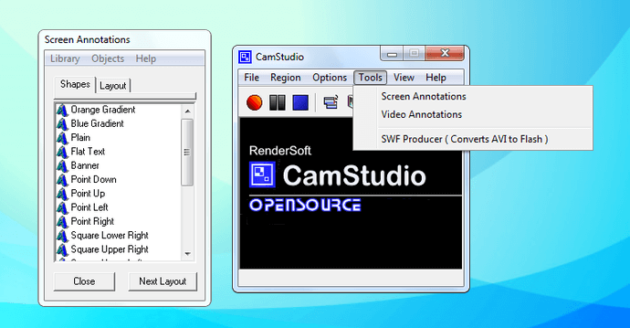
The videos are saved in AVI format. However, they can be later converted into other formats like SWF. It is mostly loved for its user-friendly and easy-to-use interface.
Pros of CamStudio
- The unique feature of creating “Video-in-Video:
- Vey light and consumes less disc space
- The cursor can be customized
- Video resolution may be set according to your needs
Cons of CamStudio
- Reports claim that it boasts a number of viruses and malware
- Outputs only to AVI with a conversion to Flash
- Audio lagging
- Lacks professional features like adding animation and annotations etc
Download CamStudio
5. Use OBS Studio
It is one of the best screen recorders for Windows 10 available for free. It is very easy to download and install.
Note: It will get installed if and only Visual C++ 2017 Redistributable (64 bit) is preinstalled in your PC.
Once you are done with installing process, open the application by double-clicking on the OBS icon. You will see:
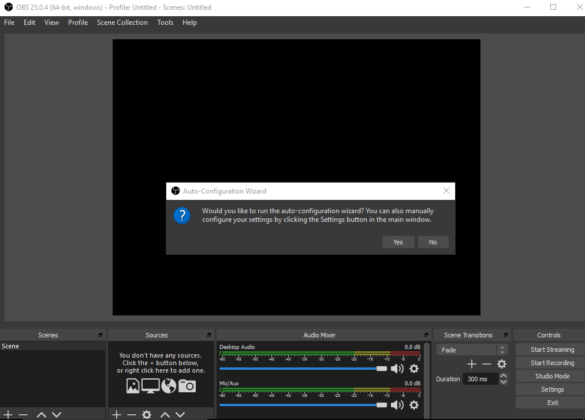
OBS is a very feature-rich program. So, before using it, you need to check all settings like enable/disable automatic recording, streaming, hotkeys, and where to store the recorded file, etc. Select “studio mode” on the bottom right of your screen, as shown below.
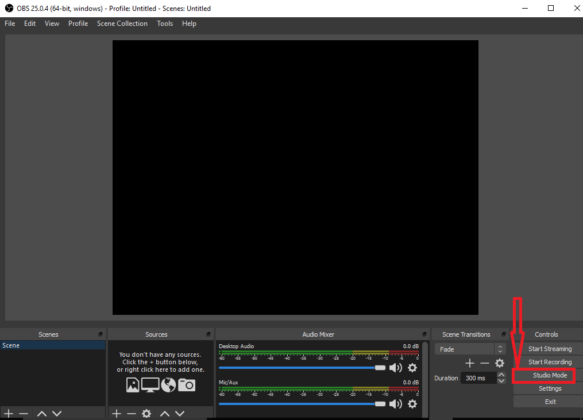
Once you select the “Studio Mode,” the black part of your screen will be split into two, “Preview” and “Program.” You need to add source by tapping on the plus (+) sign in the bottom left of the dashboard. A list will open from which you have to select whatever window you want to record, as shown in the figure below:
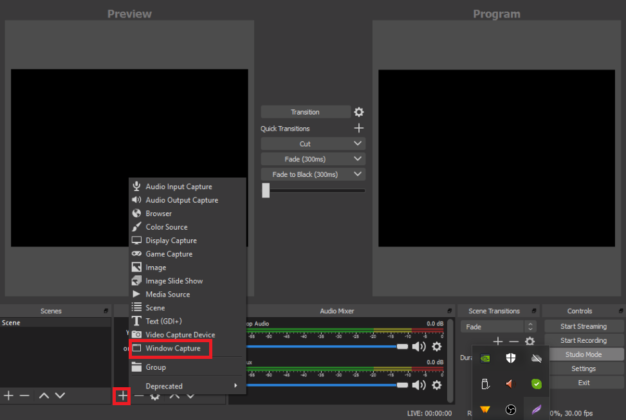
Once you select the source, your window will be shown in the “preview” panel. You may now adjust the size of the preview according to your taste by dragging the “Red Corners,” as shown in the figure below.
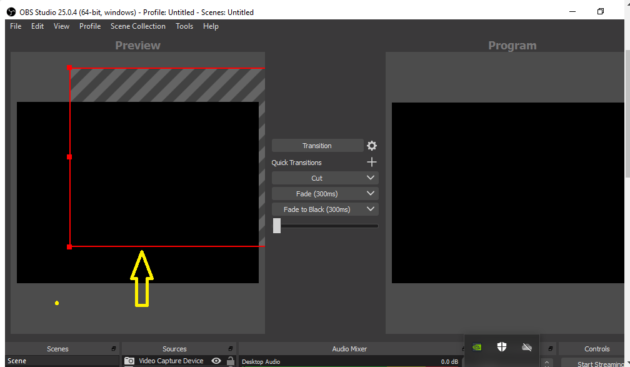
Once the preview is adjusted according to your taste, click on the “Transition” button in the center of the dashboard. After that, you may start recording your Windows 10 screen by tapping the “Start Recording” tab on the bottom right of the OBS dashboard. The videos recorded as auto-saved as “.flv” files by default in the user/videos folder. You may, however, change the path according to your wish in “settings.”
To summarize, the following are the pros and cons of OBS:
Pros of OBS
- Ability to record the full screen, webcam, microphone, computer audio
- Inbuilt audio mixer
- Direct stream to YouTube, DailyMotion, Mixer, etc
- It is ad-free
- There is no time limit, and there are no watermarks on the recording
Cons of OBS
- Absence of “Pause” function
- A video editor needs to be installed separately
- Needs a bit of experience to use it
Mastering OBS may take a bit of time. But once you master, it will be a fun thing to use.
6. Install ActivePresenter
Developed by Atomi Systems, ActivePresenter is an all-in-one video editor and screen recorder. It is a software that is equally adored by YouTube lovers, video producers as well as trainers and educators who are fond of creating how-to videos on their PCs. It has all the features that you will ever need to record your Windows 10 screen and edit it.
Though the free version comes with plenty of features, opting for a paid version will give you access to even more advanced audio and video editing options. However, you will not need a paid version until and unless you want to make a highly professional video.
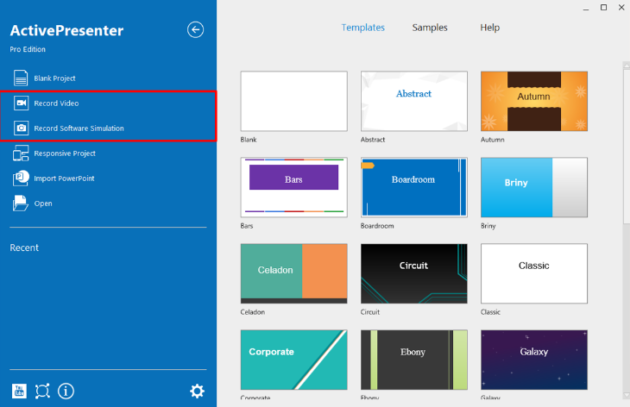
Let us now see how easy it is to install and use this software. Download ActivePresenter from its official site or click here to download and install it. Opening the app will show the following where you need to go to the left side of the dashboard and click on the “Record Video,” as shown in the above image.
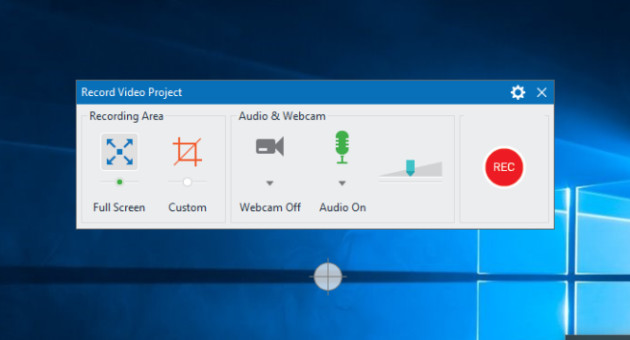
It will take you to a new dialogue box as below, and the rest is as easy as clicking the red button on the dialogue box. But before that, don’t forget to select the area you need to record adjust the audio settings.
Pros of ActivePresenter
- One of the important reasons for its popularity is the fact that even the free version of this software neither has any time restriction to record videos not does it have any watermark on the recorded videos
- You can easily edit, trim, split, change the volume and speed of the recordings
- You are also allowed to add captions, animations and annotations and much more
Cons of ActivePresenter
- If you want to export the recorded files, it will carry a watermark
- The paid version is a bit costly compared to other software
7. Use Snagit
Snagit is another powerful tool for capturing your Windows 10 screen. Be it taking a panoramic screenshot with a single click or be it or capturing a process, and you can do it with ease. It allows you to add audio explanations, emoticons, and annotations to the captured videos. The best part is it is not as complex as other software available on the free platform.
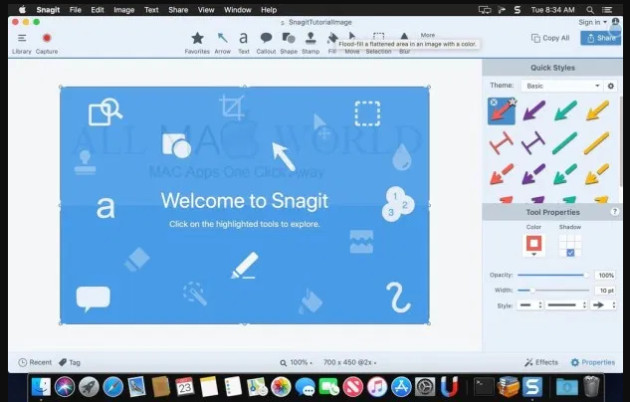
It is an ideal software if you want to train your team by creating your own audio-visual slides/videos. Its toolbar right at the center of your screen can be customized according to your preference, and it is very feature-rich.
As they say, context is everything. So, from next time whenever you happen to give a presentation, try giving it with the videos captured with Snagit as you can add your voice to the videos.
Here is how you record your Windows 10 screen using Snagit:
Launch all in one tab, or alternatively, you may directly do it by opening the video tab. Using the cursor, select the area you want to capture. One of the amazing features of Snagit is that it allows you to convert your screenshots into videos too.
Choose a viable audio/webcam settings from the toolbar. Check whether the audio channels are working to your satisfaction and, finally, click on the record button.
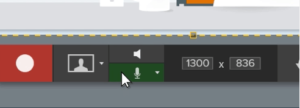
Once recorded, you can directly share your videos with the dedicated share button on the right side of the toolbar. It’s really that simple!
Pros of Snagit
- Instant image capture with one customized button
- Enables you to write annotations on the captured content, add comments emoticons and add audio too
- Apart from editing the captured content, it has a unique feature that allows to convert them into graphics
- The unique feature of panoramic and scrolling capture
- Comes with a 15-day free trial
Cons of Snagit
- The captured images are often very big than their actual size
- You will need a bit of training before using some of the advanced features
- Rarely the ‘active drop-down’ becomes invisible which reappears only after restarting your PC
Above were some of the best screen capture tools for Windows 10. Some of these may need a bit of training, while others are very simple and easy to use. You may choose one according to your needs. If you want to make professional videos, pro versions of the above are recommended as pro versions do provide customer support.
Thanks for your post! It’s helpful to find out various screen recording software.
But, There is no Bandicam in this list. Bandicam is what I am using for screen recording on PC. Works best for me.